

![]()
HOW TO ADD OR EDIT THE CHECKOUT SURVEY QUESTION
What is the Survey Question?
The Survey Question is a question you can include on the Checkout page of your store in order to obtain information from the purchaser. It is often used for associating the purchase with a staff member who referred the patient to the store, for the purpose of commission tracking. It is also commonly used by multi-location practices to request which office the patient visits, or to identify which provider the patient sees.
On your checkout page, the question is a Required field. Were it not required, the results would not be helpful because it would not be completed consistently.

It is highly recommended that you use this option only if tracking the information is not possible or practical by other means. Ecommerce experience tells us that the more questions or information the purchaser is required to answer at checkout, the higher the chance of abandonment (i.e. the purchaser will leave the page without completing a purchase).
Adding a Survey Question
- Log into Shop Manager by first logging into DermPRO OneLogin Dashboard and clicking on the Shop Manager tile.

-
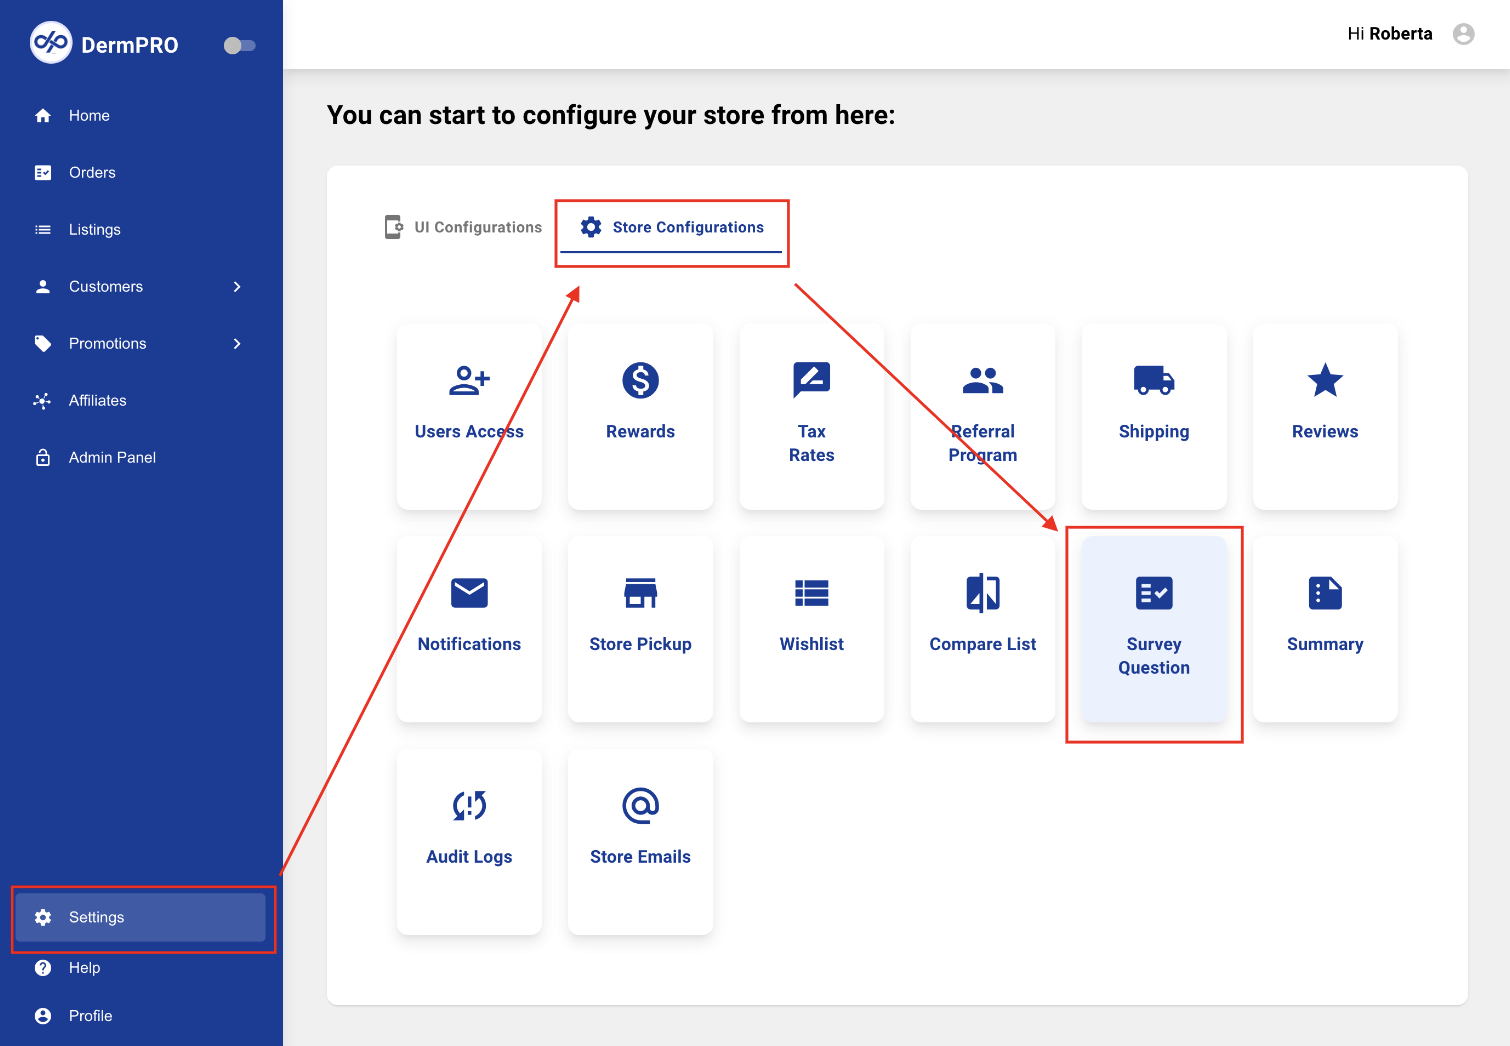
In Shop Manager, click “Settings” from the lower left menu, and select the "Store Configurations" tab.
-
Under the "Store Configurations" tab you will see the "Survey Question" tile. Click on it to Add or Update the Survey question which will be a required field at checkout on your store.
-
If you do not have a survey question enabled, toggle the Enable Survey Question switch to enable it. Type the Survey Question into the field that appears.


- Click the Add button to enable Option fields to appear, and type each option, one at a time. Each time you click Add, another option field will open. The Options will be displayed at checkout in the order they appear here. You should enter them in an order that makes the most sense for your situation. That may be alphabetically, by role (e.g. providers first, then PAs, then staff), or other.

We highly recommend including a final option that is Other/Don't Know or N/A depending on your question. In the example above, we have included a "Not a patient" option.
- If you made a mistake or need to delete an option, use the trashcan icon to delete any option that you have entered. Once you have entered all options and you are happy with the options and the order in which they appear, click the "Save Configurations" button.
- As a final step, now go to the front end of your store, place an item in your cart, and go to the checkout page to see that everything looks as expected. Your survey question will be a required field for checkout. Congratulations!
Editing the Survey Question
If you already have a survey question enabled, you may return to the Survey Question configuration to edit the question, add/delete/edit the options, or disable the survey. Use the trashcan icon to delete an option. Remember to save your edits when done, and check the front end of your store to ensure the expected result.
-----END-----

