


HOW TO CONFIGURE HOMEPAGE CALL TO ACTIONS (PREMIUM STORE ONLY)
Introduction
The Homepage Call to Actions (CTAs) are image blocks on your store's homepage that highlight key categories, products, or treatments and send customers straight to the pages you want them to visit. This guide walks you through turning the feature on and setting up each block.
Note: This feature is available to Premium Store customers only. Interested in upgrading? Learn more here: DermPRO Premium Store Upgrade
Part 1: Open the Call to Actions Page
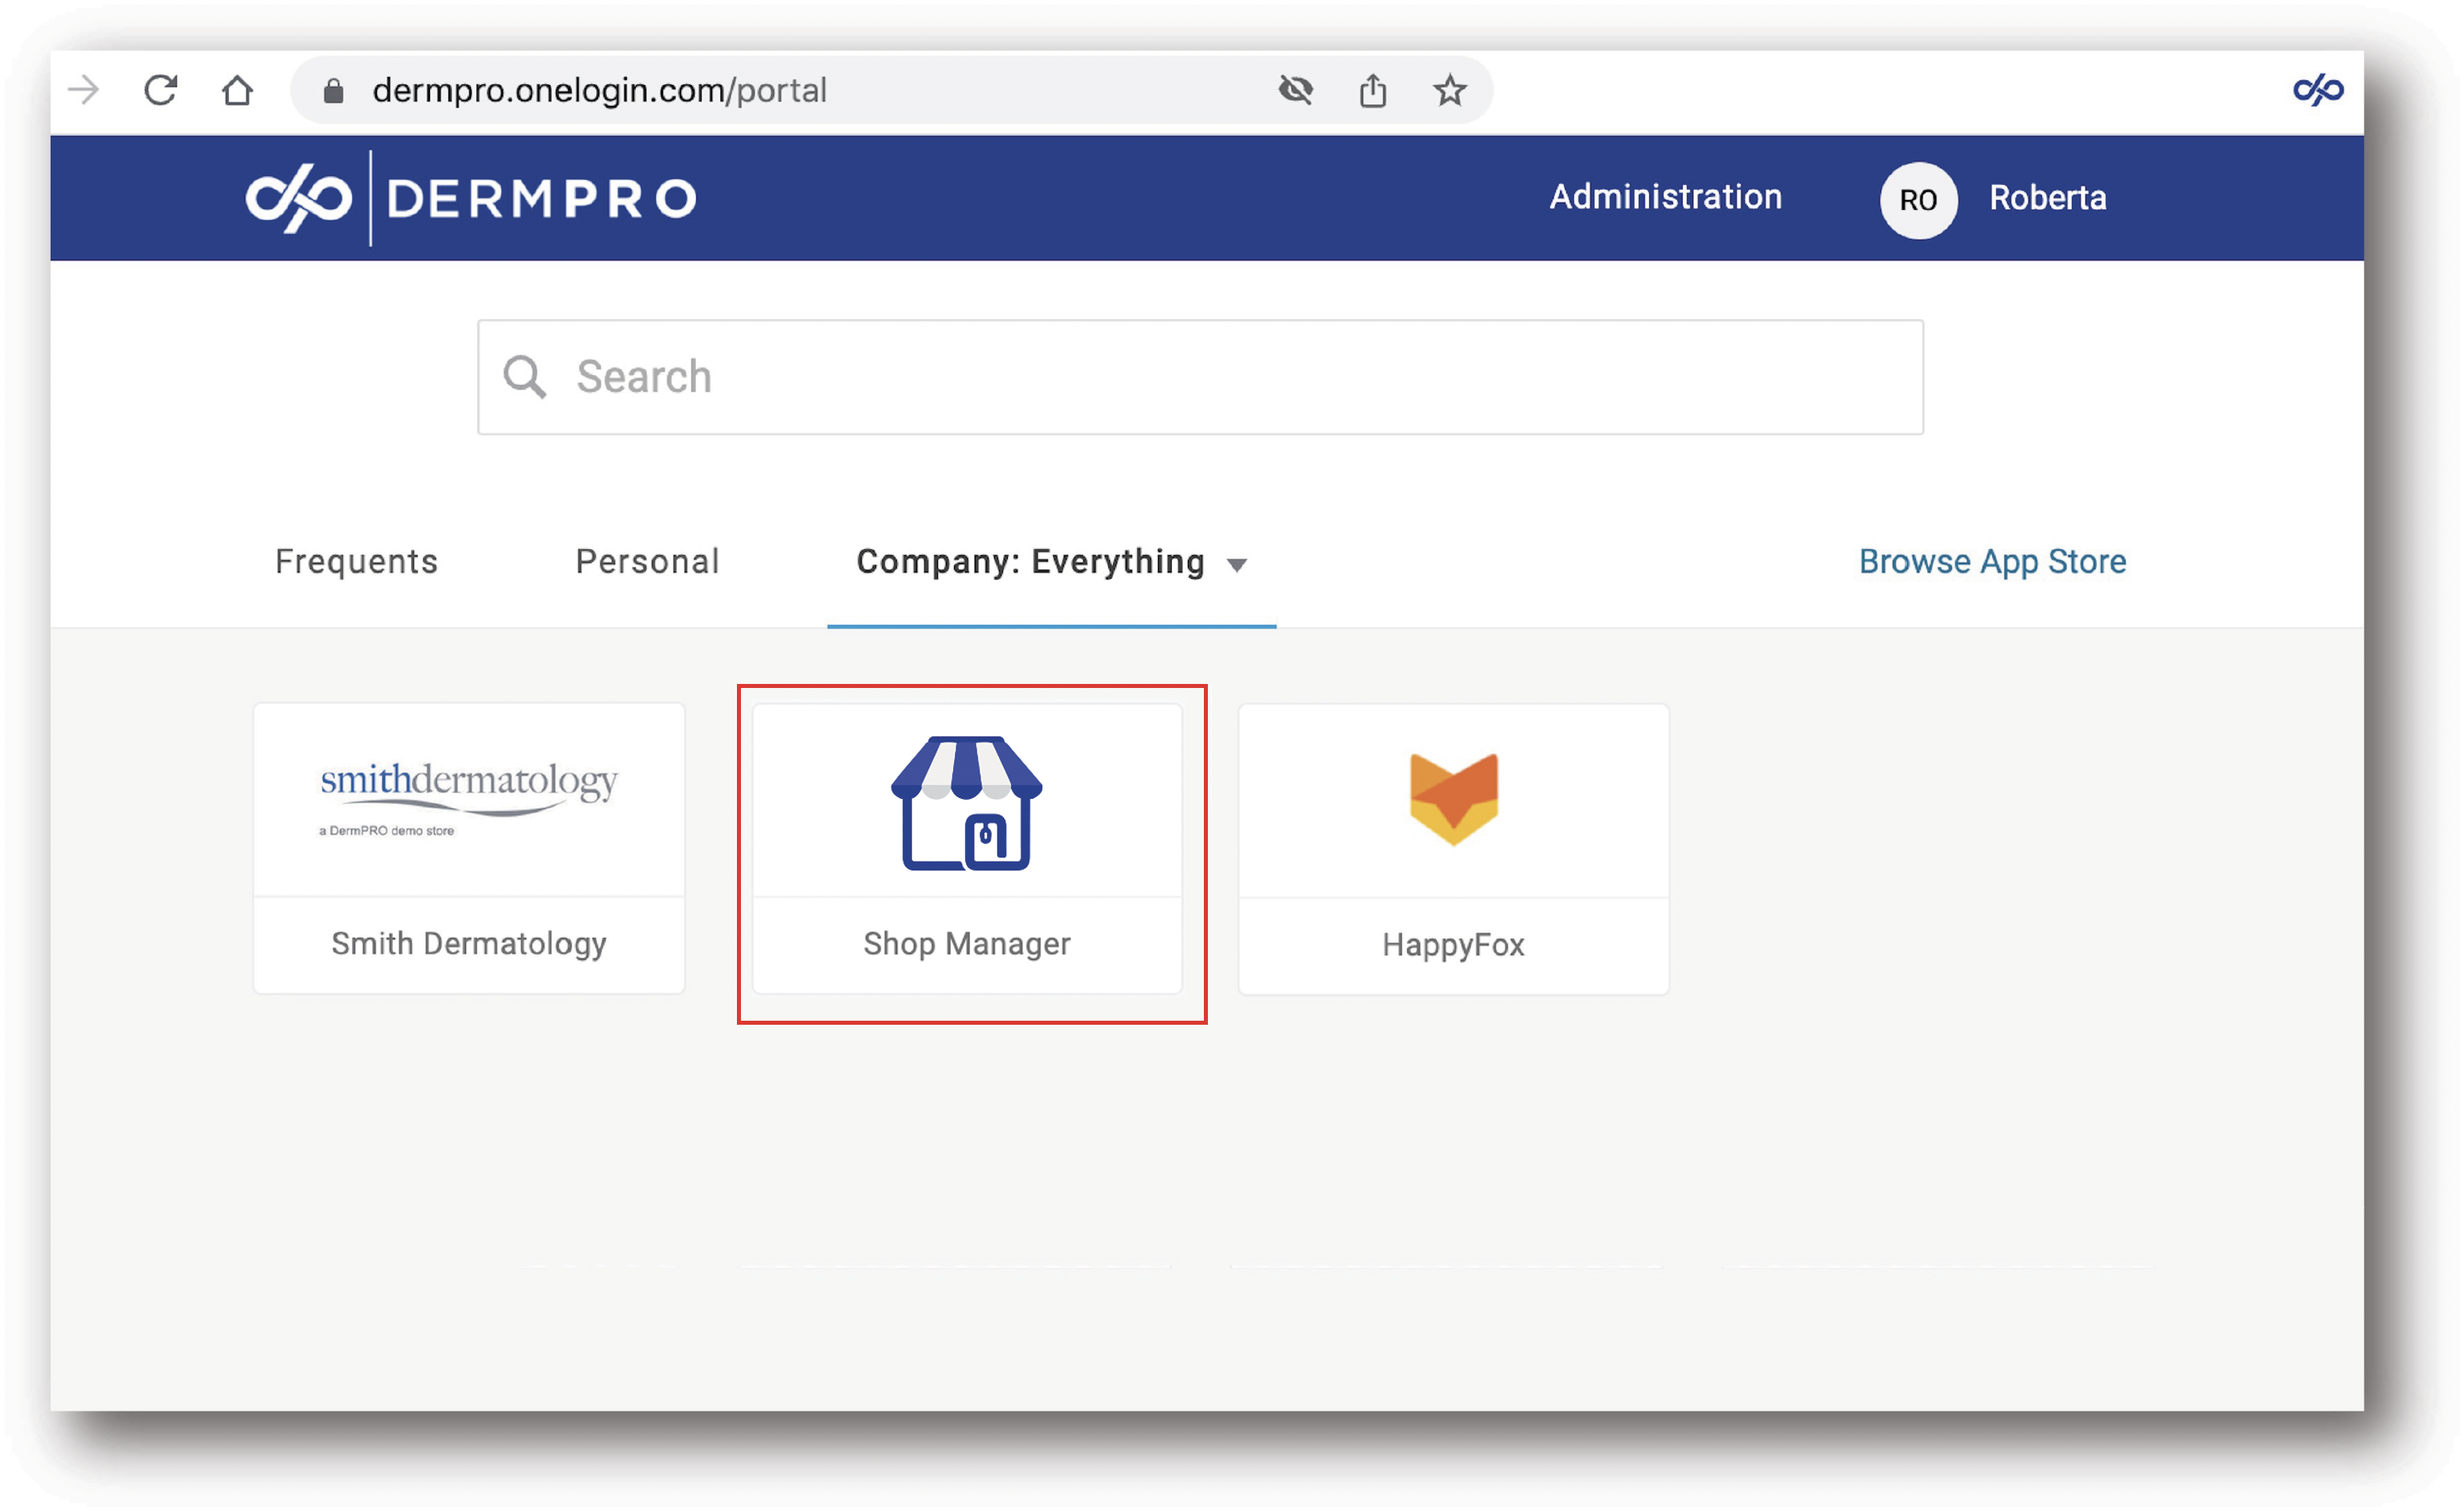
Step 1: Log into Shop Manager
Log into your DermPRO OneLogin Dashboard and click the Shop Manager tile.
Step 2: Open Settings
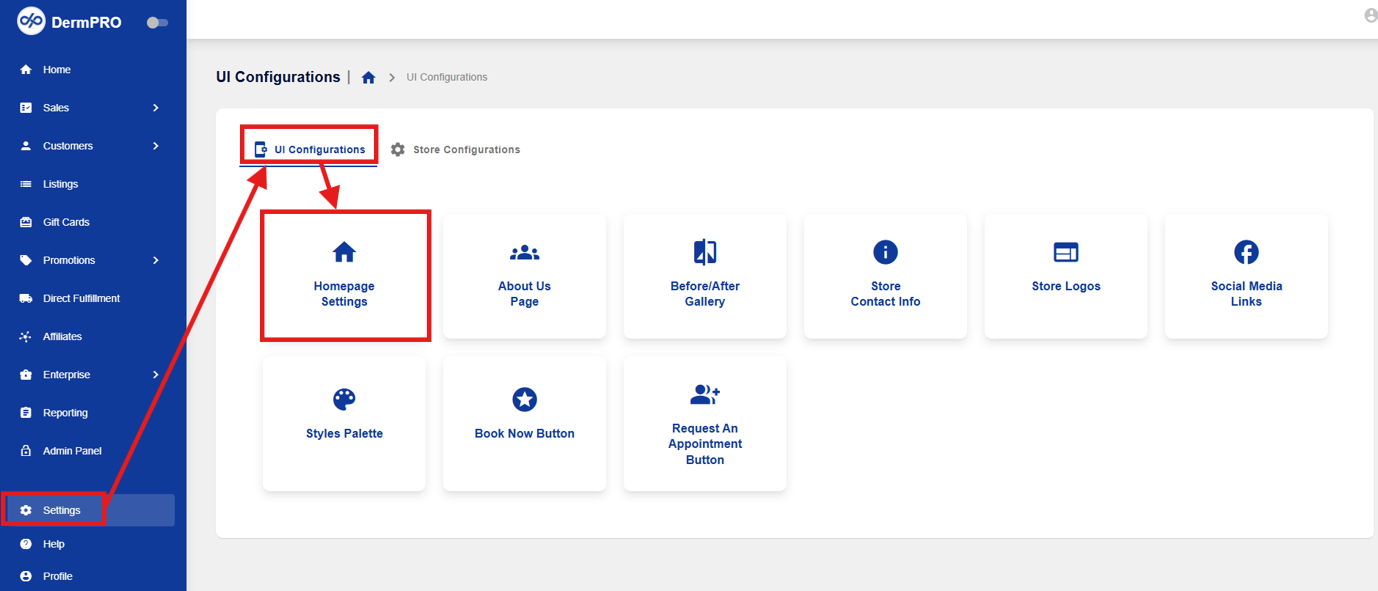
In Shop Manager, click Settings in the lower left menu.

Step 3: Go to Homepage Settings
Select the UI Configurations tab, then click Homepage Settings.
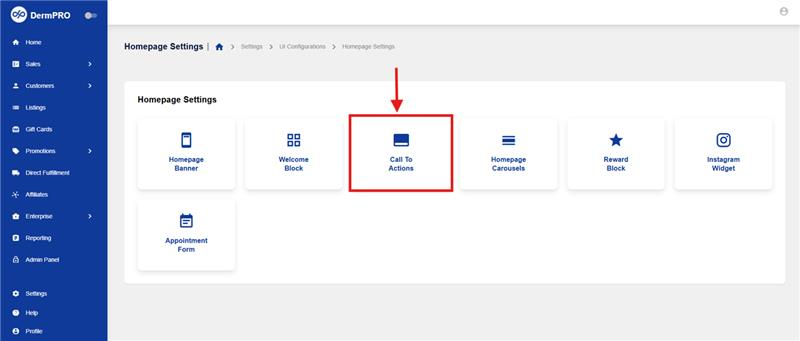
Step 4: Open Call to Actions
On the Homepage Settings page, click Call To Actions to open the page.
Part 2: Configure the Call to Actions
The Call To Actions page has four tabs:
- General
- CTA Vertical Block
- CTA Horizontal Top Block
- CTA Horizontal Bottom Block
Tab 1: General
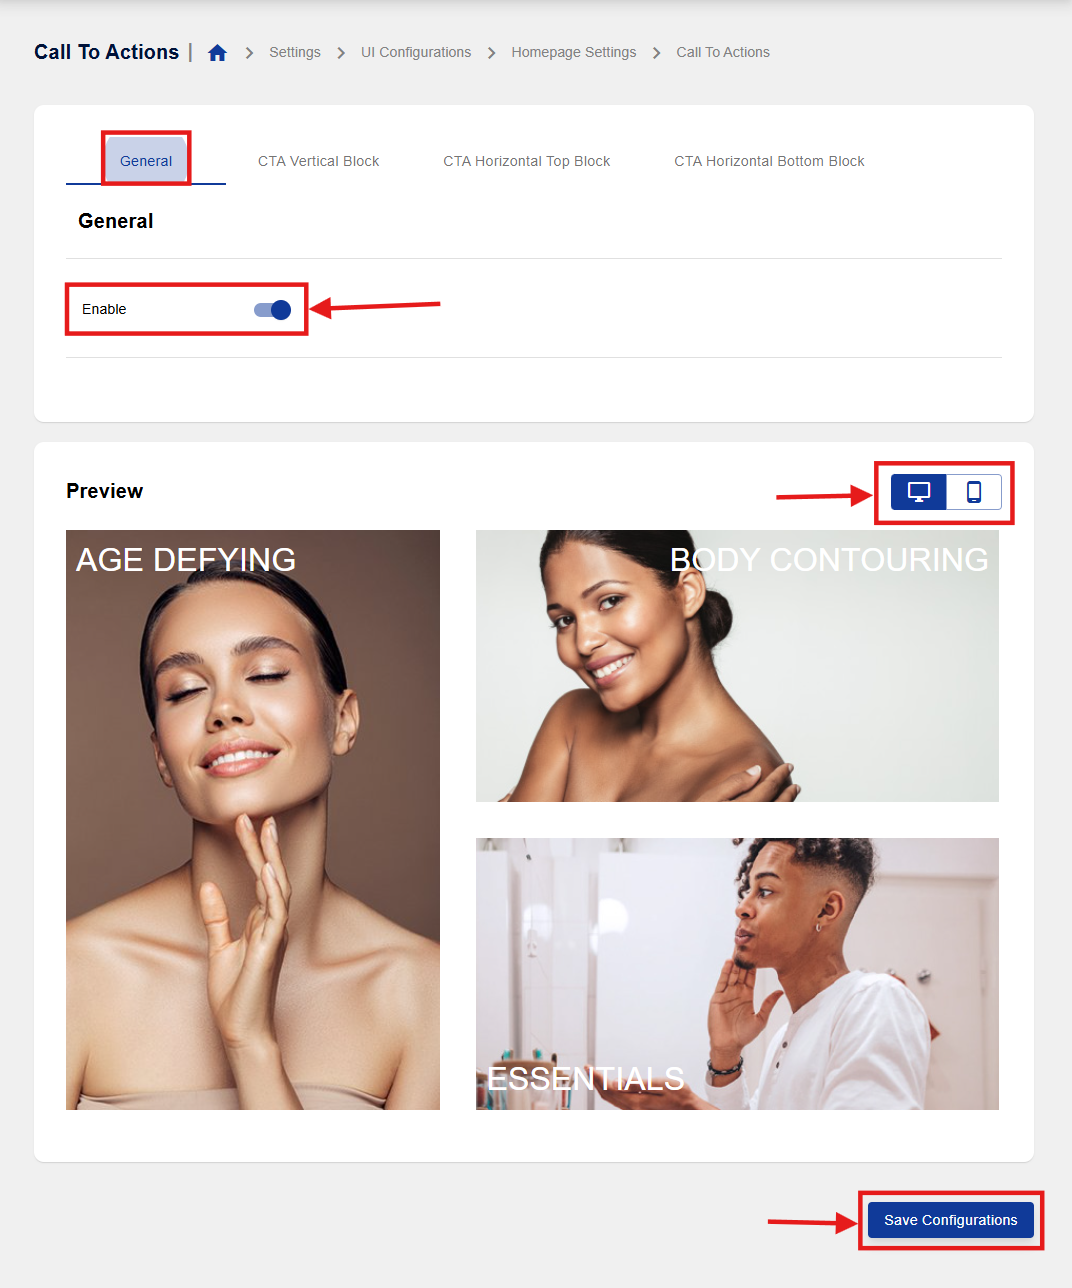
Enable toggle
- Toggle on to display the Homepage Call to Actions in your store.
- Toggle off to hide them.
- If this is disabled, all three blocks (CTA Vertical Block, CTA Horizontal Top Block, and CTA Horizontal Bottom Block) will be disabled too.
Preview
- This section shows how the Call to Actions will look on your homepage.
- Use the buttons on the right side of the Preview to switch between Desktop View and Mobile View.
Saving
- If you enable or disable the feature, scroll down and click Save Configurations at the bottom right to save your changes.
Tab 2: CTA Vertical Block
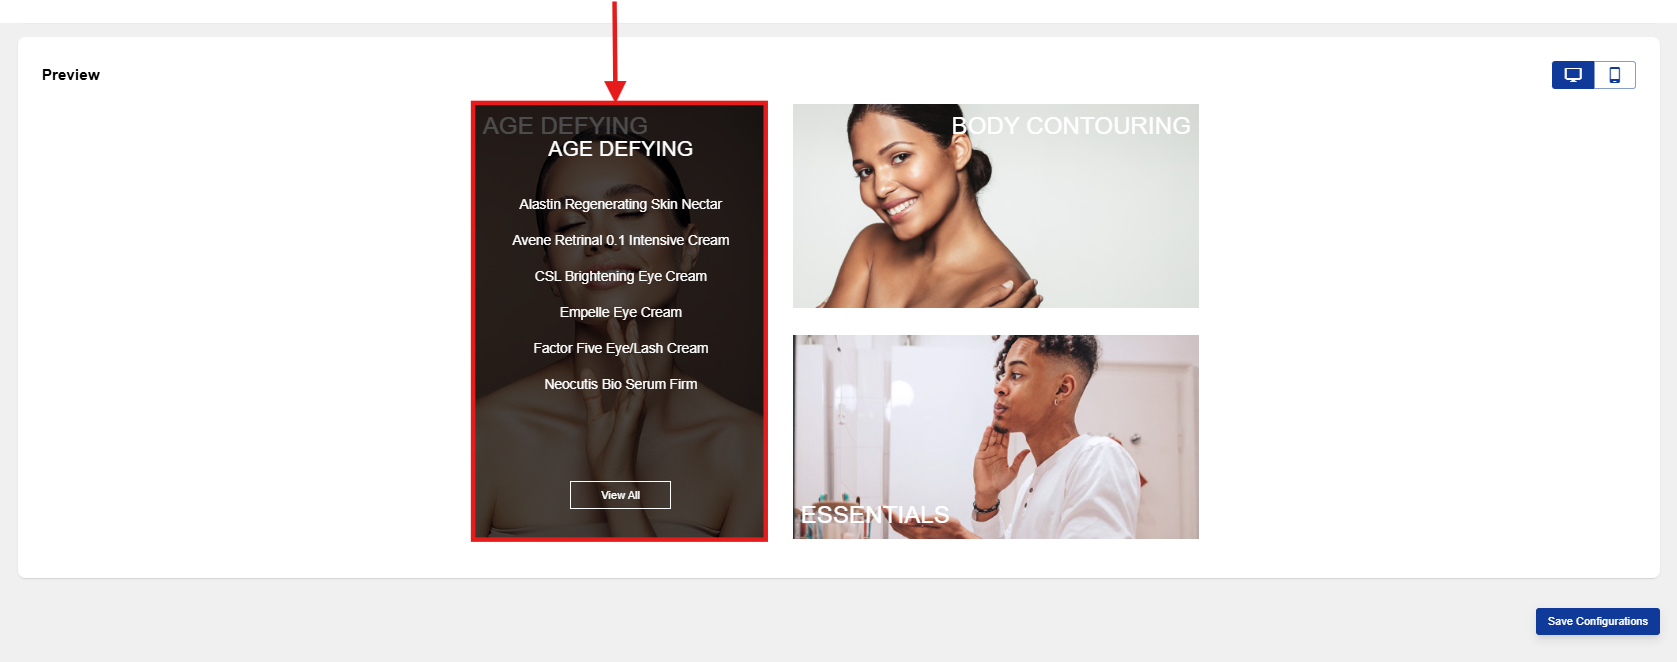
This is the tall block on the left of your Call to Actions section. Fill out the following fields:
| Field | What It Does |
|---|---|
| Block Title | The title customers see without hovering. This is usually a category, such as Products, Treatments, or Injectables. |
| Block Mask Title | The title that appears when a customer hovers over the block. |
| Links | Highlight up to 6 categories or custom items (products or treatments) related to the Block Title. For a custom item, enter the item's store page URL so customers go directly to that listing. |
| Block Button Category | Optional. Adds a View All button that sends customers to a category page. For example, if your Block Title is "Products," add your Product category page here and the button will lead to your store's Product category page. |
| Block Image | Choose an image from the library, select one of your own images, or upload a new image.
Files supported: png, jpeg, jpg. File size should be less than 250kB. Image resolution should be exactly 380x552px. |
Preview: Like the General tab, this tab has a Preview at the bottom with a Desktop View and Mobile View option.
Saving: After making changes, click Save Configurations at the bottom right.
Tab 3: CTA Horizontal Top Block
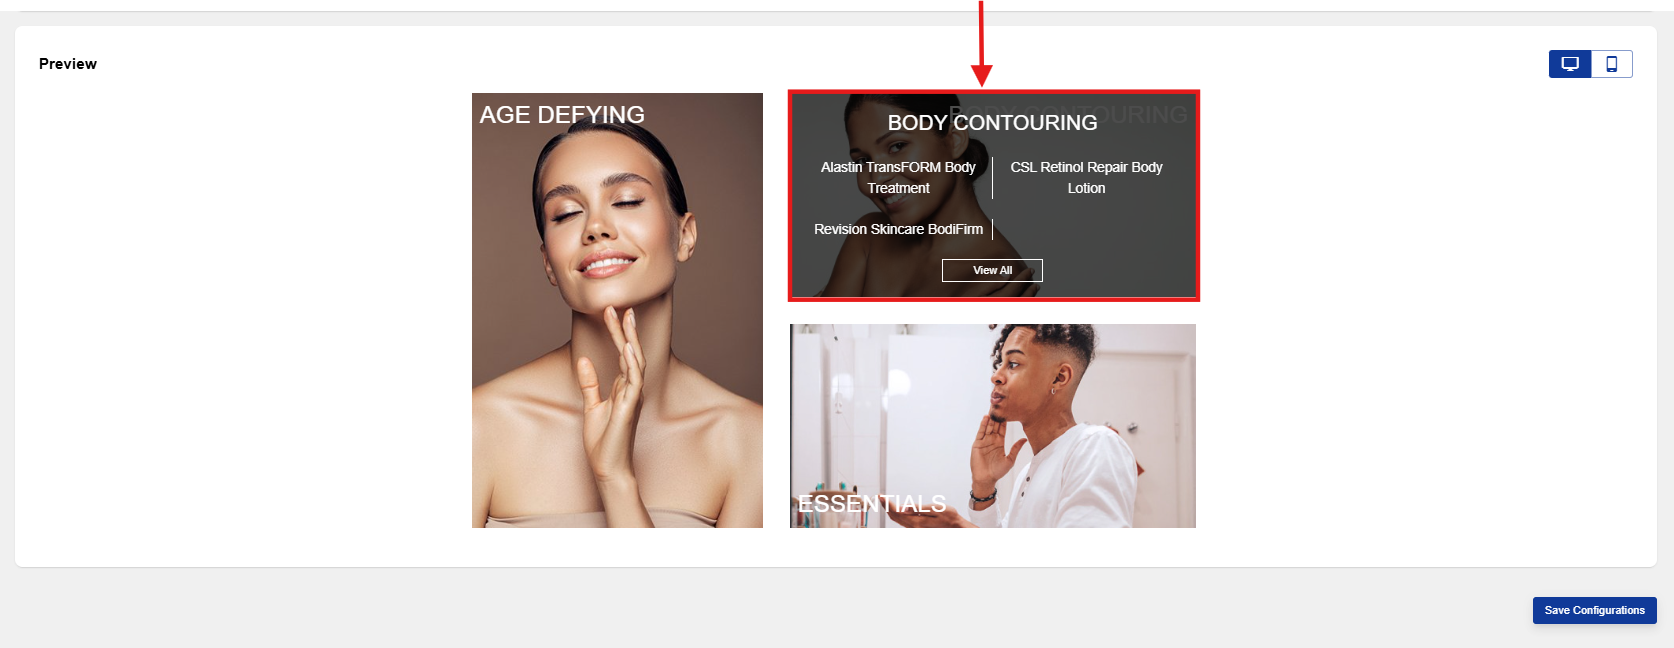
This is the wide block at the top right of your Call to Actions section. Fill out the following fields:
| Field | What It Does |
|---|---|
| Block Title | The title customers see without hovering. This is usually a category, such as Products, Treatments, or Injectables. |
| Block Mask Title | The title that appears when a customer hovers over the block. |
| Links | Highlight up to 4 categories or custom items (products or treatments) related to the Block Title. For a custom item, enter the item's store page URL so customers go directly to that listing. |
| Block Button Category | Optional. Adds a View All button that sends customers to a category page (for example, your Product category page if the Block Title is "Products"). |
| Block Image Desktop | The image shown in Desktop View. Choose from the library, select your own image, or upload a new one.
Files supported: png, jpeg, jpg. File size should be less than 250kB. Image resolution should be exactly 554x258px. |
| Block Image Mobile | The image shown in Mobile View. Choose from the library, select your own image, or upload a new one.
Files supported: png, jpeg, jpg. File size should be less than 250kB. Image resolution should be exactly 380x552px. |
Preview: Use the Preview at the bottom to check your block in Desktop View or Mobile View.
Saving: After making changes, click Save Configurations at the bottom right.
Tab 4: CTA Horizontal Bottom Block
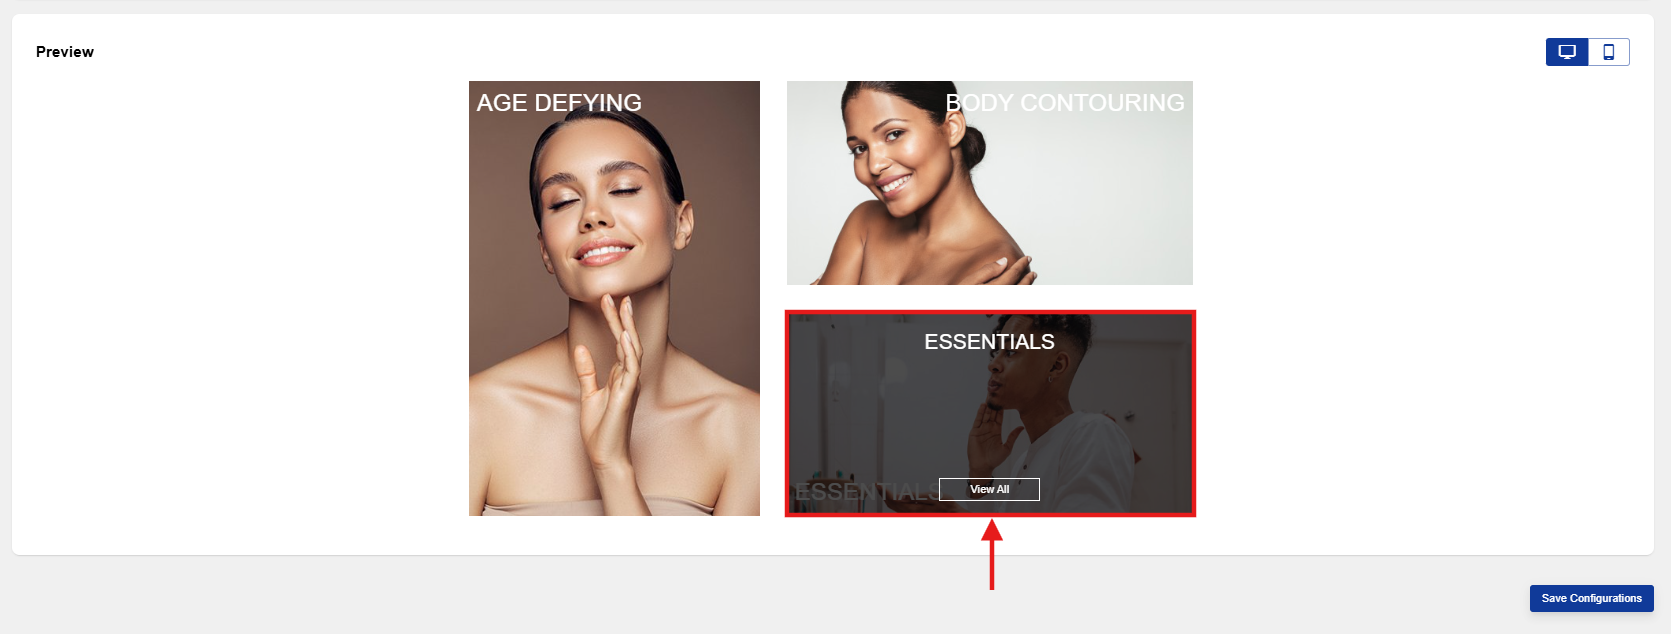
This is the wide block at the bottom right of your Call to Actions section. Fill out the following fields:
| Field | What It Does |
|---|---|
| Block Title | The title customers see without hovering. This is usually a category, such as Products, Treatments, or Injectables. |
| Block Mask Title | The title that appears when a customer hovers over the block. |
| Links | Highlight up to 4 categories or custom items (products or treatments) related to the Block Title. For a custom item, enter the item's store page URL so customers go directly to that listing. |
| Block Button Category | Optional. Adds a View All button that sends customers to a category page (for example, your Product category page if the Block Title is "Products"). |
| Block Image Desktop | The image shown in Desktop View. Choose from the library, select your own image, or upload a new one.
Files supported: png, jpeg, jpg. File size should be less than 250kB. Image resolution should be exactly 554x258px. |
| Block Image Mobile | The image shown in Mobile View. Choose from the library, select your own image, or upload a new one.
Files supported: png, jpeg, jpg. File size should be less than 250kB. Image resolution should be exactly 380x552px. |
Preview: Use the Preview at the bottom to check your block in Desktop View or Mobile View.
Saving: After making changes, click Save Configurations at the bottom right.
Quick Tips
- Check both views. Use the Desktop and Mobile preview buttons to confirm each block looks right on every device.
- Save each time. Click Save Configurations after editing each block so your changes aren't lost.
- Use direct links. For custom products or treatments, paste the exact store page URL so customers land on the right listing.
- Keep titles clear. Short category names like "Injectables" or "Products" work best for the Block Title.
NOTE: Refresh the page on the store front end to see the edits made in Shop Manager.
-----END-----

